Laptop Source
User Guide Topics
Video Lesson
Laptop Source
This section provides the information needed to utilize the laptop source in our learning spaces. This includes details on cable types available in our spaces as well as information on connections for both audio and video.
First, you will need to start class. You can refer to the “Class Types” document as a reminder for which class type is best for you.
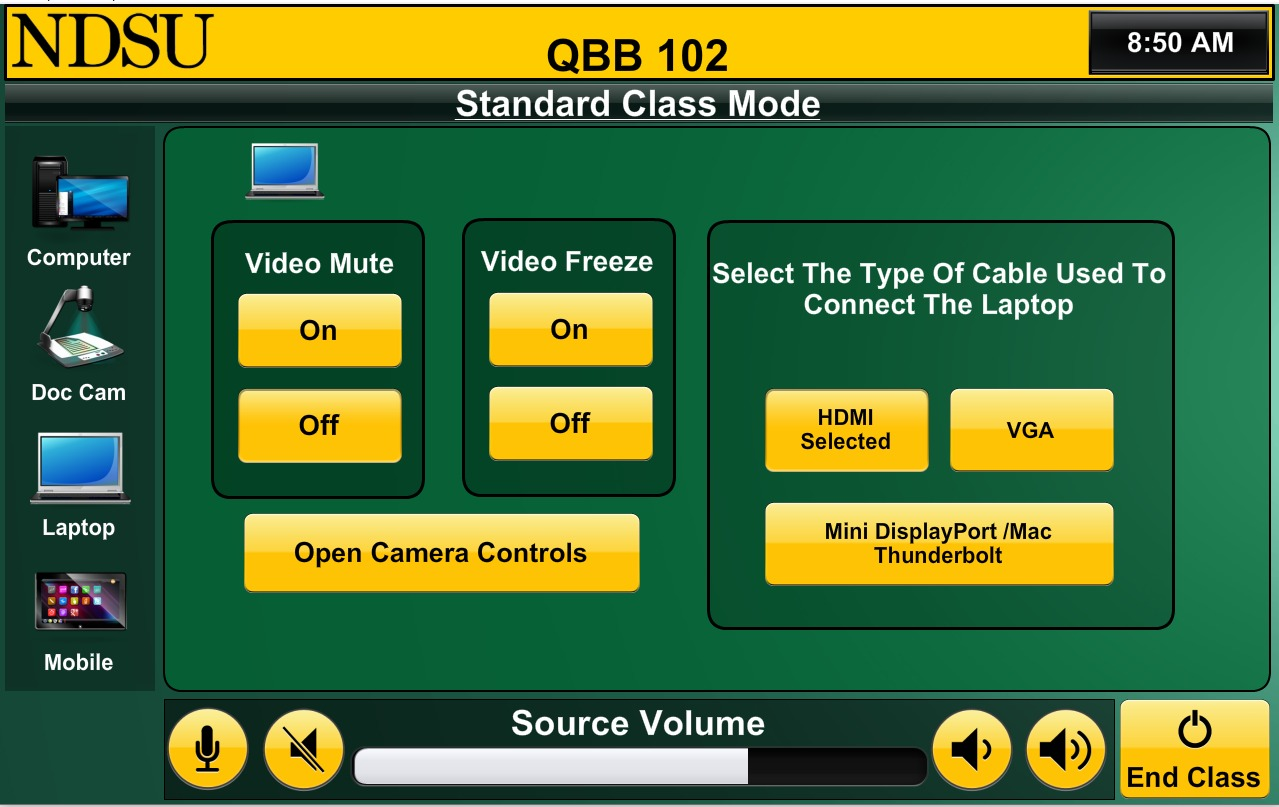
After the system has taken the necessary time to start up, select the laptop source. This can be found underneath the document camera option on the left-hand side of the touchscreen. When the menu opens, you will see the same freeze and video mute controls as with the computer and document camera menus. In addition, there will be a menu towards the right side of the touchscreen that lets you select the cable type you will use for your laptop.
Most rooms provide an HDMI and a USB-C cable. Some rooms are also equipped with either a Mini DisplayPort cable or a VGA cable. All the cables available in the room can be found inside the small black compartment on the instructor’s cabinet. Please note that you must also use the headphone cable for audio if you choose to use a VGA connection.
To share your laptop, connect the correct cable(s) to your personal device, and select the corresponding cable type on the touchscreen.
Needing to access files too large to be moved to the instructor computer in the classroom or needing to use licensed software only available on your device are just two reasons for using your laptop instead of the desktop computer already provided in the room.
Please note that connecting your laptop to the room system using these cables does not provide access to the room's cameras or microphones on your laptop. Please start your videoconference connection or Yuja recording using the desktop computer in the room and then share your laptop in the videoconference connection or select it as a source in the room after starting your Yuja recording.
|
Connection Type |
Connector |
Touch Screen Display |
|---|---|---|
|
HDMI |
|
|
|
Mini DisplayPort / Thunderbolt |
|
|
|
VGA |
|
|
|
USB-C |
|
|


