Document Camera
User Guide Topics
Video Lesson
Document Camera
The following document will help you understand how to utilize the document camera provided in our learning spaces. This will allow for more efficient use and smoother transitions when using this equipment for lectures.
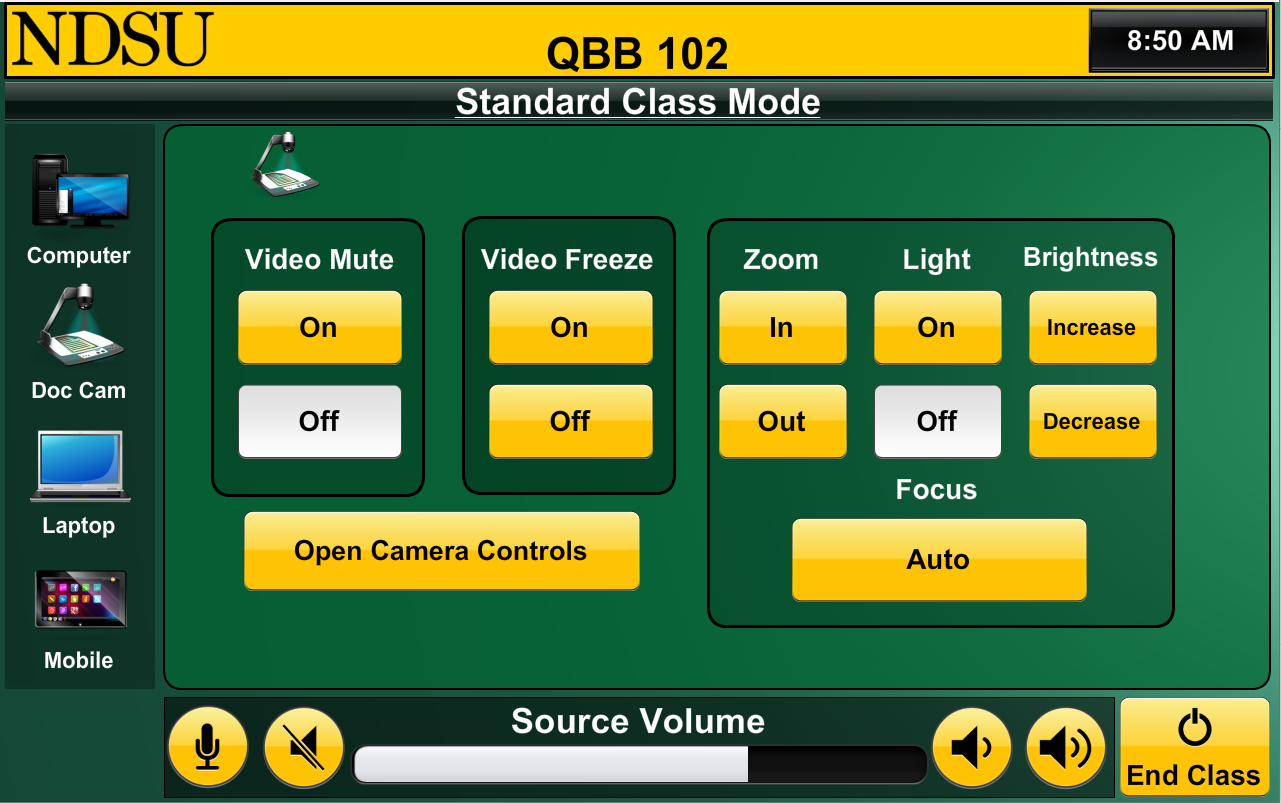
After you have started the system, select the document camera icon underneath the computer on the left-hand side of the touchscreen. As the document camera is turned off by default until selected, it will take a few seconds for the equipment to turn on and display on the screens in the room.
While you wait, please ensure that the document camera is in a good starting position to view what you are presenting to the class. This only applies to tabletop document cameras, not ceiling mounted ones.
When the document camera is fully functional, you can use a variety of commands on the touchscreen to adjust it as needed.
The video freeze and video mute options function just like they do with the computer source. If you are unsure how they function, please review the previous section on the computer source.
There are added functions that are exclusive to the document camera. They include brightness, light, zoom, focus, and auto-focus.
Controlling Brightness
The brightness function contains two buttons labeled “Increase” and “Decrease.” These buttons adjust the exposure of the camera to take in more or less light as needed.

Controlling the Light
The light controls are available for tabletop document cameras only (not for ceiling mounted ones). These document cameras contain either a separate arm that contains a light, or have a light installed behind the camera. The controls on the touchscreen act as a switch to turn the light on and off.

Controlling Zoom
The next function is the zoom function. This allows you to adjust the camera’s zoom to appropriately fit the material you are presenting to the class on the screen.

Controlling Focus
The focus buttons adjust how the camera focuses. You can select between near and far as needed. However, we recommend using the auto focus function. This allows the camera to fix itself and does not require manual adjustment.


