Touchscreen Audio Controls
User Guide Topics
Video Lesson
Touchscreen Audio Controls
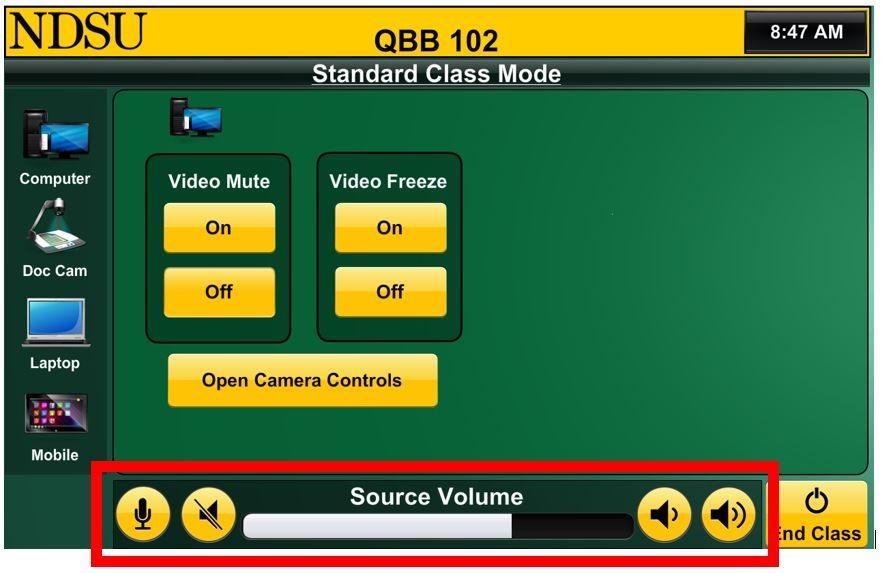
The volume controls for the audio output in your classroom can be found at the bottom of the touchscreen. These controls will adjust the audio level for any source that is being used, including the PC and any connected laptops or mobile devices. The mute button will turn all audio output off inside the classroom. The volume up and down buttons will increase and decrease the output volume in the classroom.
In order to adjust the audio level from an individual application, please use the volume controls for that application rather than these controls. For example, if your remote students are sounding good inside the classroom, but your YouTube video is too loud, please use the volume controls inside YouTube to adjust the level for just this application.
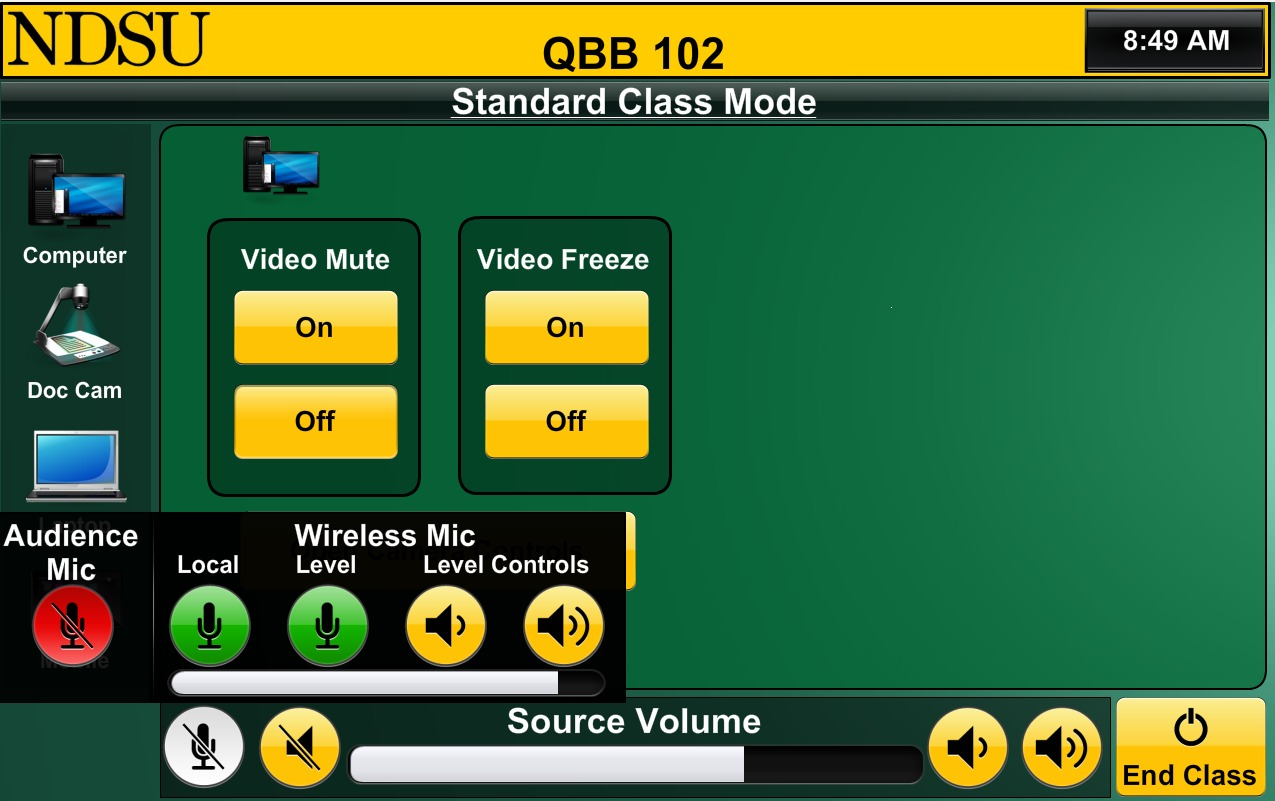
The microphone controls can be accessed by clicking on the microphone icon in the bottom left corner. The audience microphones in the classroom are muted by default. Audience microphones are either ceiling mounted microphones or catchbox microphones. Ceiling microphones turn from red (muted) to green (unmuted) when the audience mic button is pushed. Celling microphones do not amplify the audio they receive, meaning that they will not play back the speakers' voices the way the instructor’s lapel microphone does. Catchbox microphones do not have a visual indication of being muted or unmuted, but they do play back the audio in the room, so when using a catchbox microphone you should hear your voice coming back out of the speakers. If you don’t hear it, the catchbox is either muted or the battery might be empty.
The remaining 4 buttons in the microphone control area adjust the instructor’s lapel microphone. In most use cases, these buttons are not needed by the majority of users.
The button labeled local will mute the lapel microphone audio in the classroom, so it will not be amplified in the room, but the microphone signal is still going into the computer and can be heard on a recording or by remote students in a videoconference call. The level button does the opposite and will keep the amplification in the room intact, but mute the signal from the mic going into the computer, so while you can be heard in the room, the audio does not get captured on a recording or by remote students.
Lastly, the buttons under the heading "Level Controls" will adjust the level of the instructor’s lapel microphone. The button to the left will decrease the microphone signal, making your voice appear quieter in the room and on the recording. The button on the right will increase the microphone signal and make your voice appear louder in the room and on the recording.


