Scheduling a Zoom Meeting
Once you have claimed your Zoom account through the NDSU Zoom portal at https://ndsu.zoom.us you are ready to schedule your first meeting. Meetings can be scheduled through the NDSU Zoom web portal or by using the Zoom Outlook Add-in. Both options will be discussed here.
Scheduling a Zoom Meeting - Web Portal
The first part of the Zoom meeting scheduling window is for basic meeting details, such as the meeting title as well as meeting dates and times.

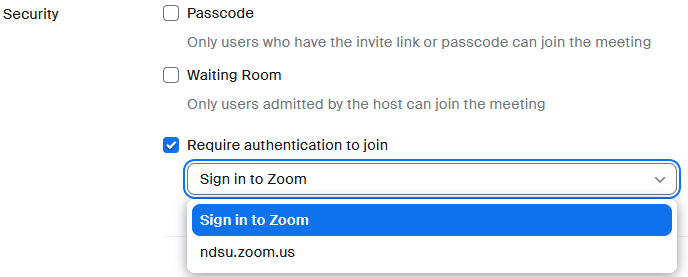
Below the basic information section you find the security settings for the particular meeting you are scheduling. We encourage using at least one security setting for your call, but you can use more than one of these options to improve security for your meeting even further. Selecting "require authentication to join" will require all of your attendees to be signed into a Zoom account (Sign in to Zoom) or to be signed into their NDSU Zoom account (ndsu.zoom.us), which would prevent anybody from outside the institution to connect to your meeting.
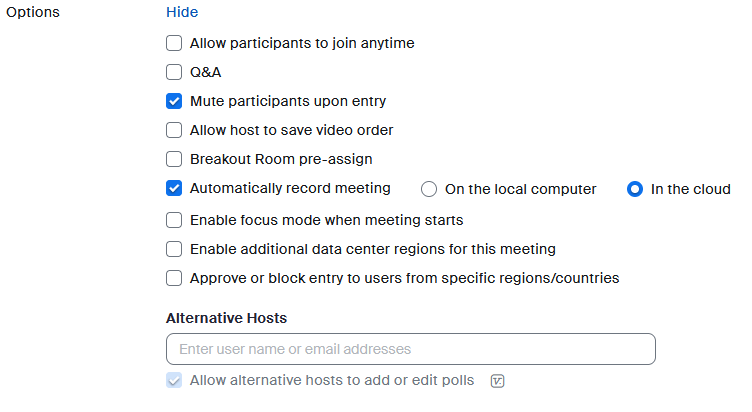
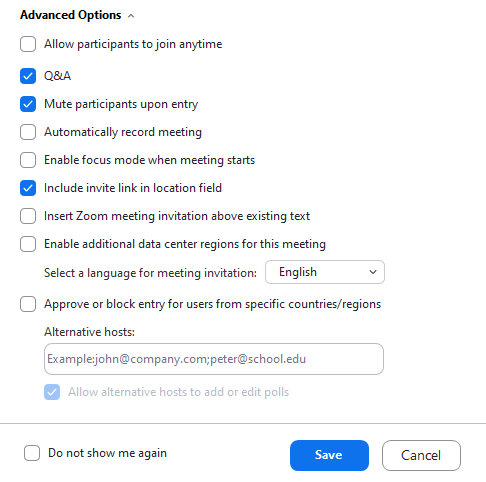
The last section of the meeting scheduling window gives you an opportunity to add additional options, such as automatic recordings or the Q&A feature. We suggest leaving "allow participants to join anytime" unchecked and placing a check mark in the "mute participants upon entry" option. Adding alternative hosts can be helpful if somebody other than you should be able to start your Zoom meeting and have ability to adjust settings inside of your meeting. Users added as alternative hosts have to have an NDSU Zoom account.
The following article provides additional information on scheduling Zoom Meetings provided by Zoom: Scheduling Meetings
Scheduling a Zoom Meeting - Outlook Add-in
Before you can start scheduling Zoom meetings directly from your Outlook desktop client, you must first download the Add-in from the Zoom Download Center at https://zoom.us/download. Scroll down the page until you find the section for Zoom Microsoft Outlook Add-in and select "Add Zoom."
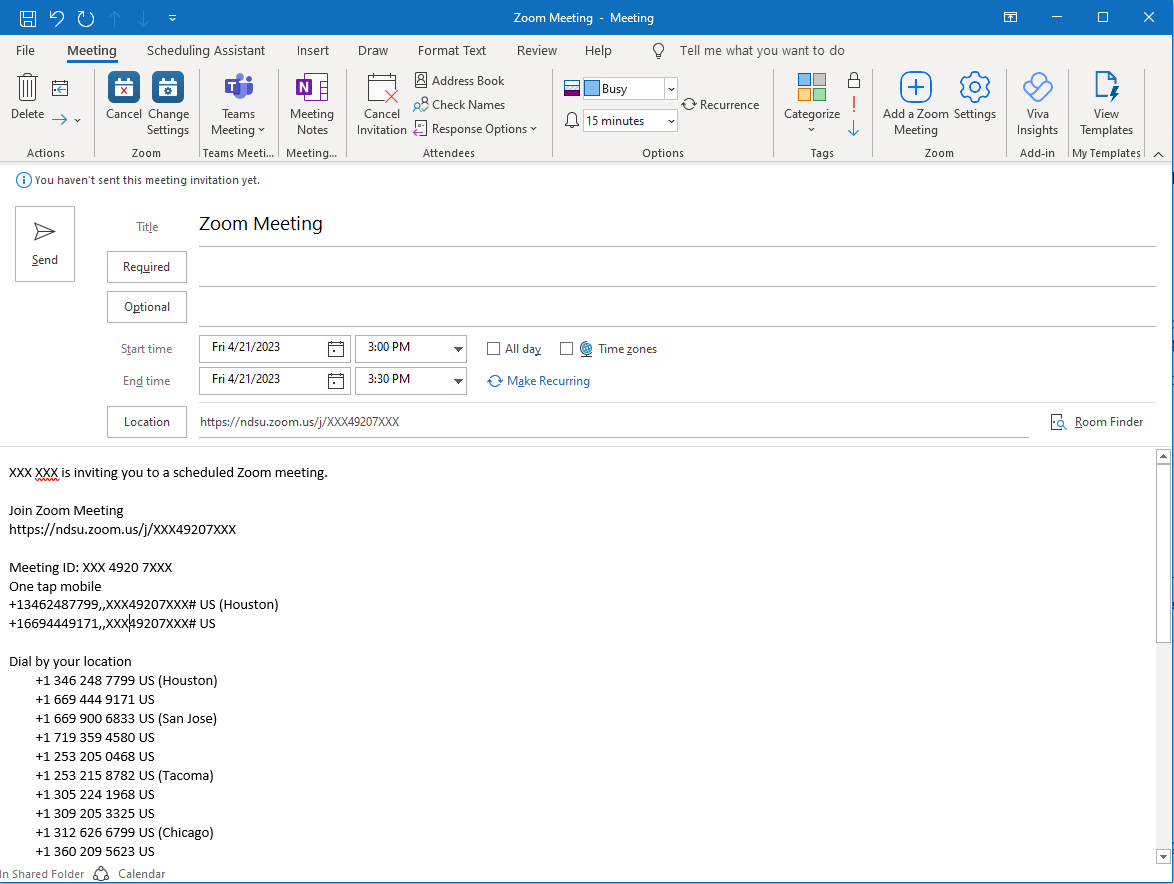
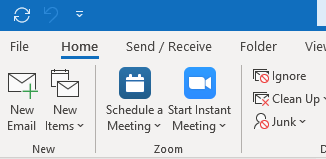
Once installed, open Outlook and find the new Zoom buttons available in the top ribbon. In order to schedule your first meeting, please select "Schedule a Meeting".
This will bring up the familiar Zoom meeting scheduling interface. You can choose between scheduling a new meeting with an automatically generated meeting ID or use your personal meeting ID. Next you can select the security features you would like enabled for this connection and then move to the advanced options section.

In the advanced options, you can select to have your meeting recorded automatically, use the Q&A feature, add alternative hosts, and any of the other features available for your Zoom meetings.
Once you are done and select "Save" you will see a familiar Outlook meeting window with all of your Zoom meeting details prepopulated. Simply add any required and optional attendees into the correct fields, add any additional information you want to provide to all attendees in the email body, and then select send.