Qualtrics: Making surveys accessible
How to change the Display name in Qualtrics
- Start with a survey open and then go to Survey Options.
- Find General tab under Options.
- Find Display Name Type the name of the survey in the box.


Steps For Changing the Next Button(s) and Back Button(s)
- Click on the block so the entire block is highlighted in a light blue outline.
- On the left in the Edit block under Format, click on Next/Previous button text.
- Fill out the text boxes labeled Previous Button Text: and Next Button Text:.
- Click Save
- Complete steps 1-4 for every block. Be sure the last block says "Submit" and there are no page breaks in the block.


The back button will not show on your survey until you turn it on in Survey Options under Responses.
Even if you have the setting enabled in your survey options, a back button may not appear on a survey page in some cases. This is due to the presence of elements between blocks in your survey flow. Any element (branch logic, embedded data, randomizer, web service, etc.) will disable the back button on the first page of the block after it.
Back Button
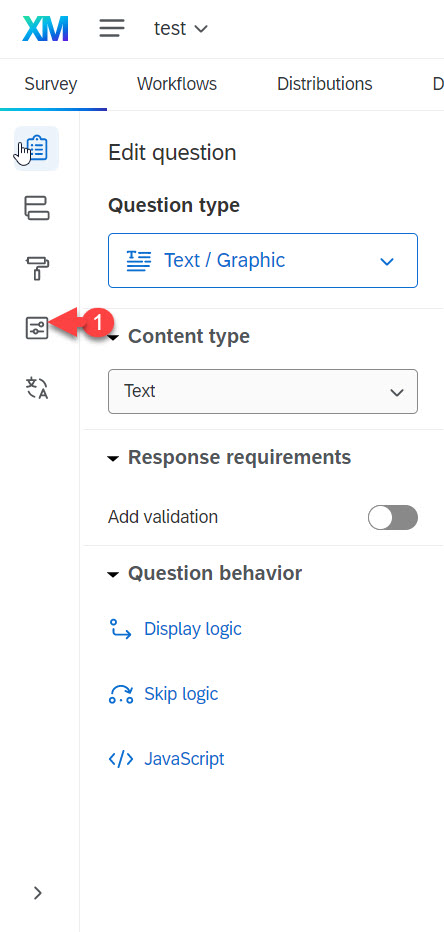
- Survey options (The fourth icon down)
- Under Back button set the toggle button to On.

Submit Button
To make the submit button work, make sure there are no page breaks in that block. If you did not check the tiny box in the display logic setting, the display logic will be page breaks. When possible put one question in the last block. Follow the same steps for adding a "Next" button, but instead of Next, type Submit.
- Click on the block to highlight the entire block in light blue outline.
- Look to the left for the Edit block, and under Format, click on the Next/Previous button text.
- Fill out the text boxes labeled Previous Button Text: and Next Button Text:.
- Click Save
The New Survey Taking Experience is a new Qualtrics layout that is now recommended. It is best to start with the layout before building your survey because some questions are still not supported and are grayed out. The New Survey Taking Experience layout is more mobile-friendly and allows access to the following question types:
- Matrix: Likert scale variation,
- Slider,
- Drop and Drag Rank Order, and
- File Upload.
Steps to add New Survey Taking Experience layout to a survey
- Select the Look and Feel (paint brush)
- Select General
- Turn on New Survey Taking Experience.
- To take off the New Survey Taking Experience go to Survey options > General.
- This layout should be applied for all of your surveys whenever you make them.
If you are not using New Survey Taking Experience
All matrix questions must be converted to side-by-side questions with a single column if you are not using the new survey taking experience layout.