Zoom Recording
Zoom can record any meeting that is held on its platform. As the host, you have the ability to schedule automated recordings for future events or start a recording on the fly inside your meeting. You can also give permission for attendees to record your meeting to their accounts or to access the recording of your meeting after the event has concluded.
Scheduling an Automatic Recording
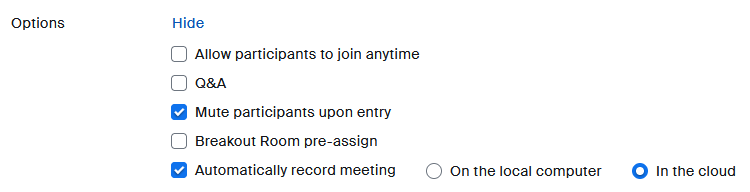
You can schedule a Zoom recording from within your Blackboard Learn Original course if it is intended for a class connection or from the NDSU Zoom portal at https://ndsu.zoom.us. Once you are logged in, select to schedule a new meeting and enter all necessary information. Towards the end of the scheduling page you will see a meeting options section with an option to "recording meeting automatically". Once this checkbox is selected, you will be able to choose between recording on the local computer or in the cloud. Recording on the local computer will save the recording file on the computer used by the host of the meeting, which in cases of class recordings is oftentimes the instructor computer in the classroom. Therefore, this option is not suggested in most cases. Selecting an automatic recording in the cloud will make the recording immediately available to all students in your Blackboard Learn Original course (if the meeting is scheduled in Blackboard Learn Original) or allow you to easily share the link with your students (if the meeting was scheduled inside the Zoom page).
Manually Starting a Recording
You can start a recording for any meetings for which you are the host. You can also start a recording for a meeting you attend as long as the host gives permission to your recording request. In order to start a recording in a meeting, simply find the record button at the bottom of your Zoom window and click on it. You will see an option to recording to this computer or to record in the cloud. In most instances we suggest selecting the option to record in the cloud for easier access to the recording after the event.

Accessing a Cloud Recording
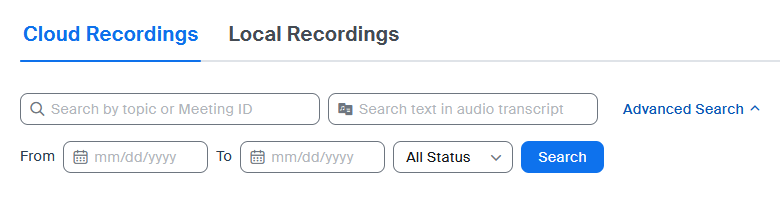
You can find your cloud recordings by logging into your Zoom account at https://ndsu.zoom.us. Once logged in, locate the "Recordings" link on the left hand of your screen and then select the recording you would like to view or share. If you are searching for a particular recording within the list, you can use the search tools at the top of the page to quickly find the needed recording.
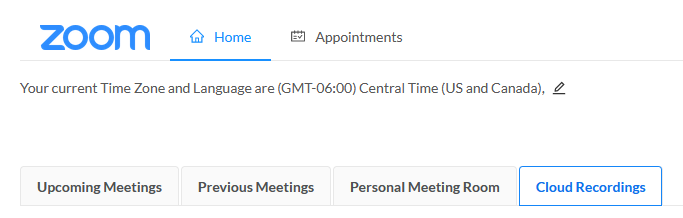
You can also access a recording directly inside of Blackboard Learn Original, as long as the meeting was scheduled using the Zoom tool in Blackboard. After signing into your Blackboard Learn course, select the Zoom tool in the menu list of Blackboard Learn Original and then select the "Cloud Recordings" tab at the top of the page. This section contains all cloud recordings completed for this particular course.
Accessing a Local Recording
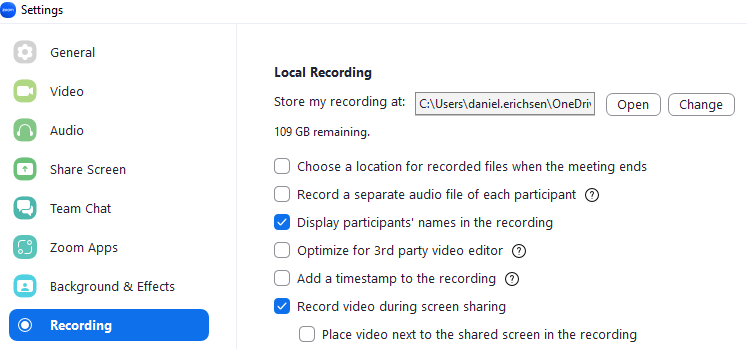
Local recordings will be stored by default in the following directories on your computer:
- Windows: C:\Users\[Username]\Documents\Zoom
- Mac: /Users/[Username]/Documents/Zoom
- Linux: home/[Username]/Documents/Zoom
You can change the default directory for your local Zoom recordings or find the correct path for your recording folder by opening your Zoom desktop client and selecting your profile picture. Then select Settings and click on the option for Recordings. At the top of this section will be the current directory information for your local recordings and an option to change it.