How to transfer data on CCAST using Globus
Describes the process for transferring data between storage locations within CCAST, and between CCAST and other institutions.
Globus is a research data transfer service that allows for high-throughput, unattended data transfers between Globus endpoints. A Globus endpoint can either be an institution or organization (such as CCAST), or a personal laptop, workstation, or server. This document describes how to transfer data between CCAST Thunder Prime filesystem locations (i.e. home, scratch, projects) and the CCAST Tier2 filesystem, but the steps outlined can be applied to any two Globus endpoints.
Generic documentation on transferring data with Globus can be found here. The steps below correspond to the steps in the official Globus documentation, with additional information specific to CCAST.
1. Login to Globus with CCAST/NDSU credentials.
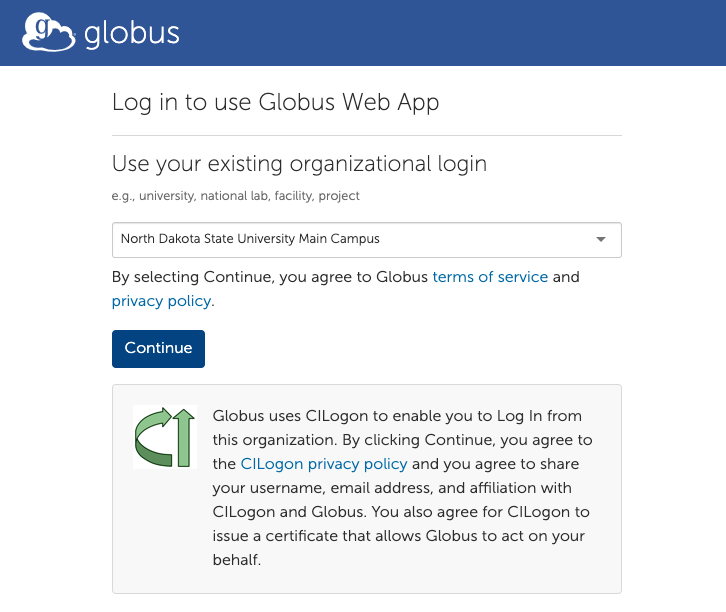
In a browser, navigate to https://www.globus.org and click "Log In" in the upper right corner. On the login page, select "North Dakota State University Main Campus" from the dropdown menu of institutions and click "Continue."
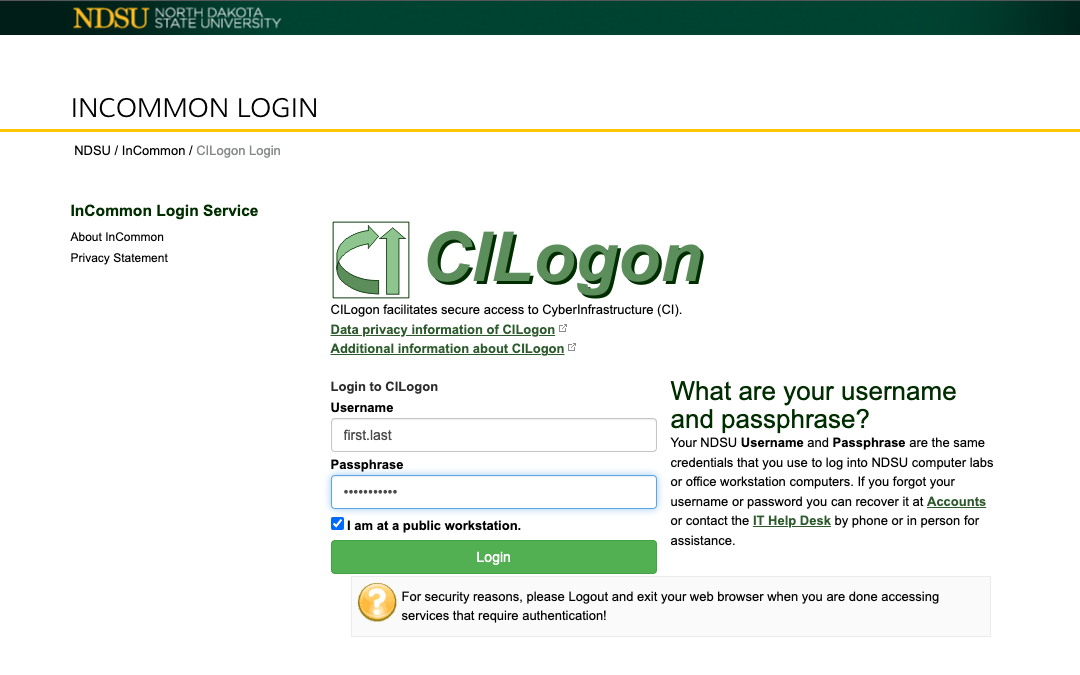
You will be redirected to the NDSU CILogon authentication page. Enter your NDSU credentials and login.
If logging into Globus for the first time, you will be guided through the setup process, which includes verifying your account information and granting Globus permission to perform data transfers on your behalf.
2. Find CCAST data collections in the File Manager.
Upon completing the setup for your Globus account, you should be redirected to the File Manager. If you are not, you can navigate to the File Manager by clicking the corresponding icon in the menu on the left.
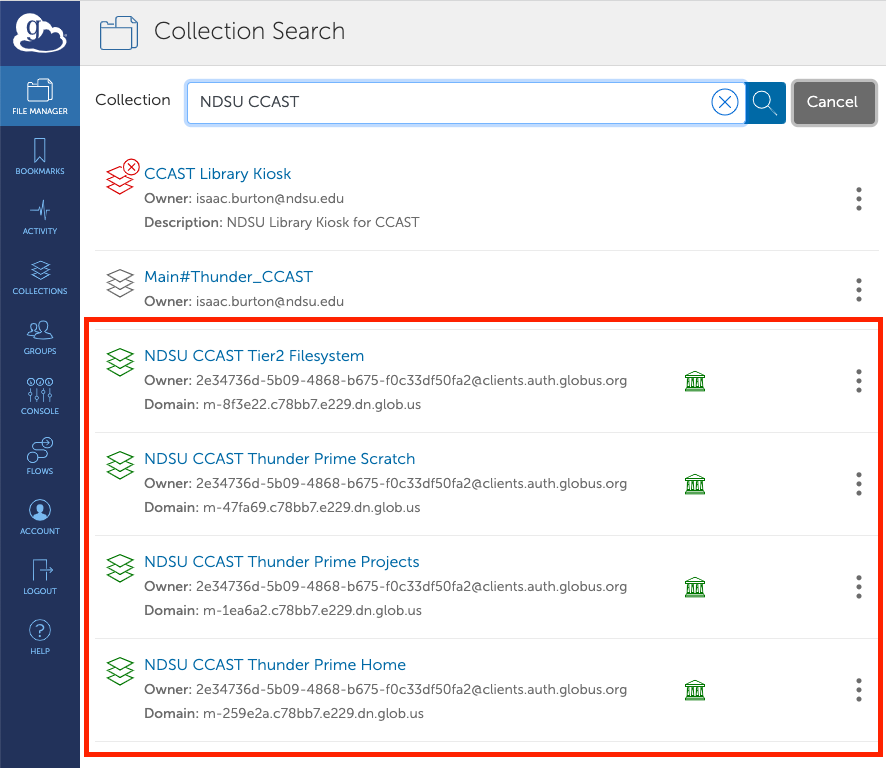
CCAST has 4 data collections connected to Globus:
- NDSU CCAST Thunder Prime Home – maps to /mmfs1/home
- NDSU CCAST Thunder Prime Scratch – maps to /mmfs1/scratch
- NDSU CCAST Thunder Prime Projects – maps to /mmfs1/projects
- NDSU CCAST Tier2 Filesystem – maps to /t2fs (only available to select PIs at this time)
To use one of these collections, search for "NDSU CCAST" in the "Collections" field and select the one you need from the suggested results.
If successful, you should see a directory listing for the collection you selected that matched what you see on Thunder Prime.
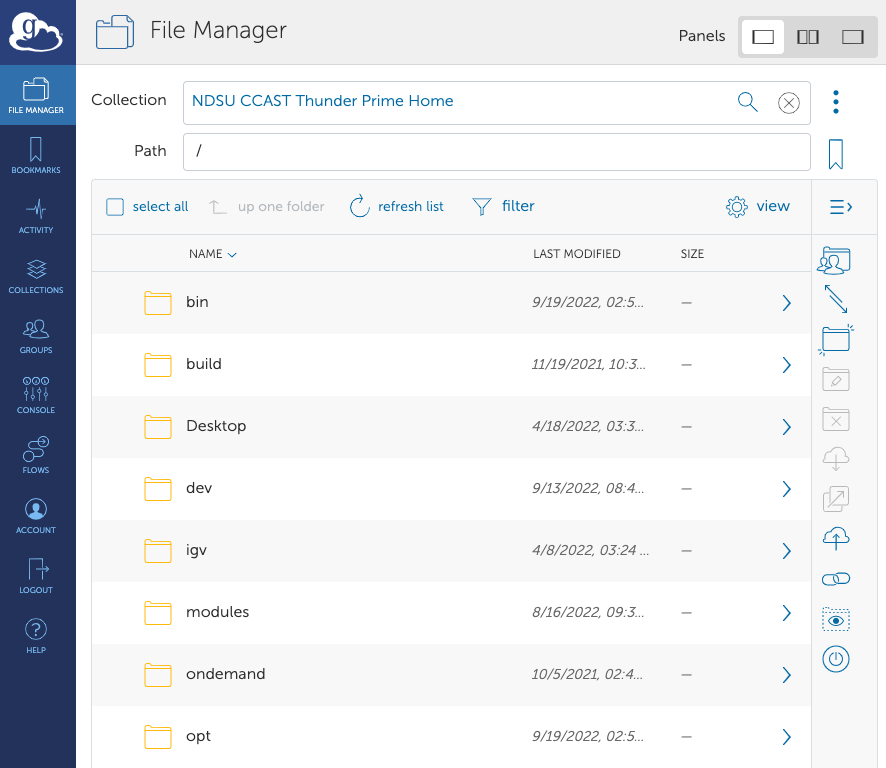
Note: For Home and Scratch collections, you will automatically be placed in your own home/scratch directory on Thunder Prime. To access Thunder home/scratch directories, add 'thunder.home' or 'thunder.scratch' to the beginning of the path.
For the Projects collection, you will be placed in the root projects folder and will have to navigate one level further to your PI's project folder from the list.
3. Transfer data between collections.
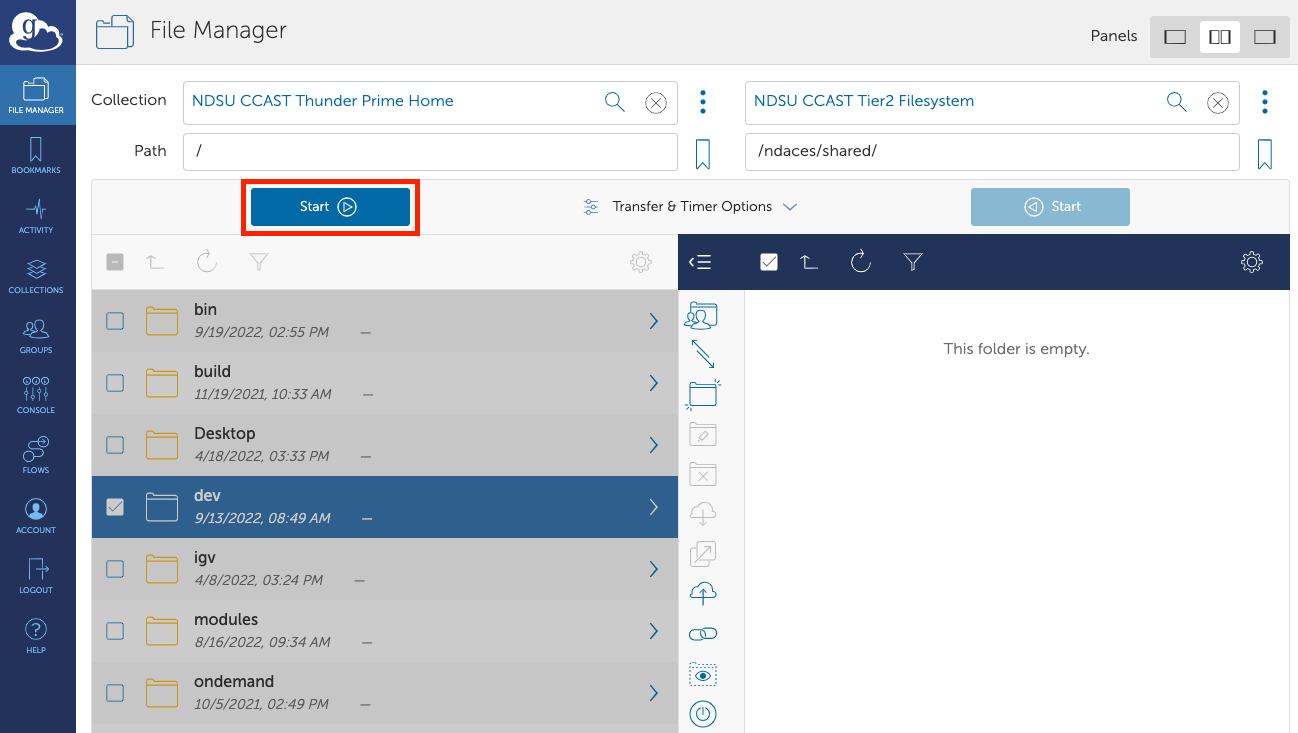
In the top-right corner of the File Manager window, change the view to a 2-panel display. Either panel can be a transfer source or destination, but for simplicity, we will have the left panel be the source and the right panel be the destination.
In the left (source) panel, find the data collection you want to transfer data from, according to step 2 above. This may be a CCAST data collection, or may be a collection at another institution where you have data stored. Navigate further, as needed, until you reach the specific folder you want to transfer.
In the right (destination) panel, find the data collection you want to transfer data to. Again, navigate to the specific folder where you want the data in the left panel to end up.
Click the "Start" button on the left (source) side to begin the transfer.
4. Monitor your transfer.
If the transfer is initiated successfully, you will see a pop-up notification indicated that it has started, with a link to monitor the progress. To see a list of your past and present transfers, select the "Activity" icon in the menu on the left.
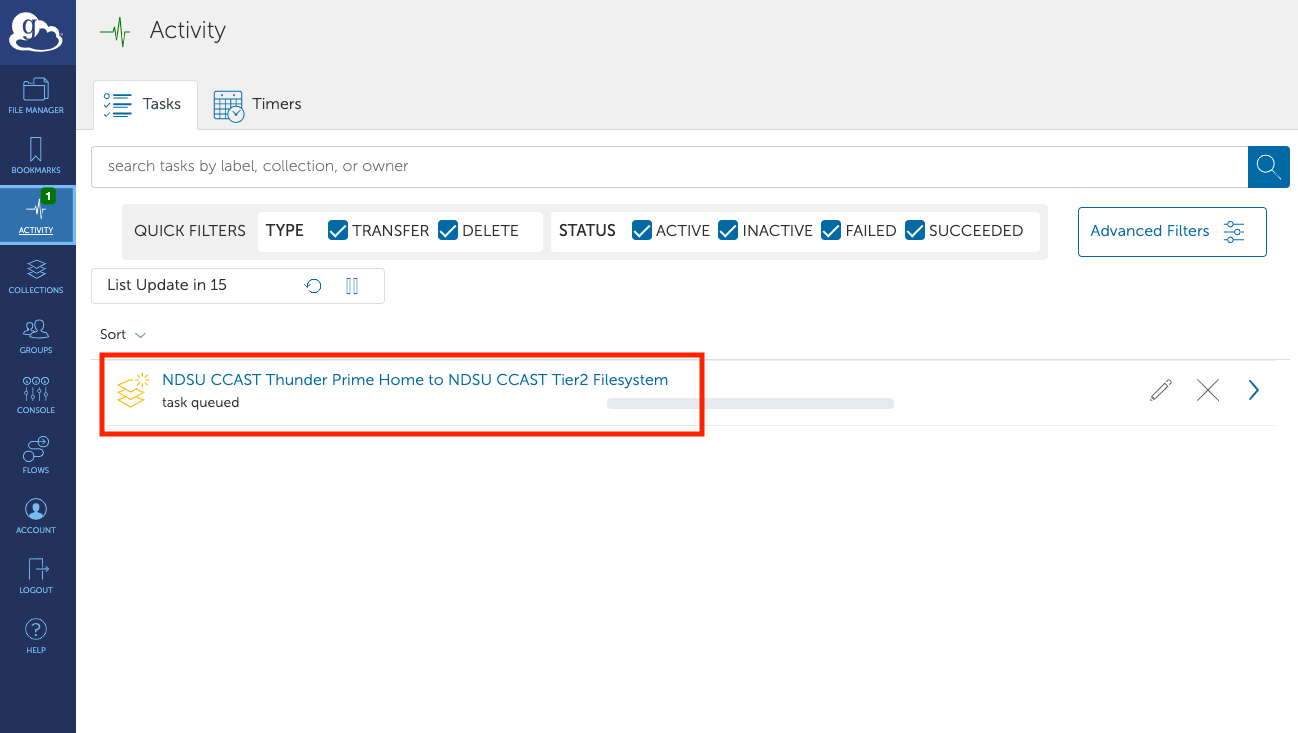
To see detailed information and transfer stats about a particular transfer, select it from the list.
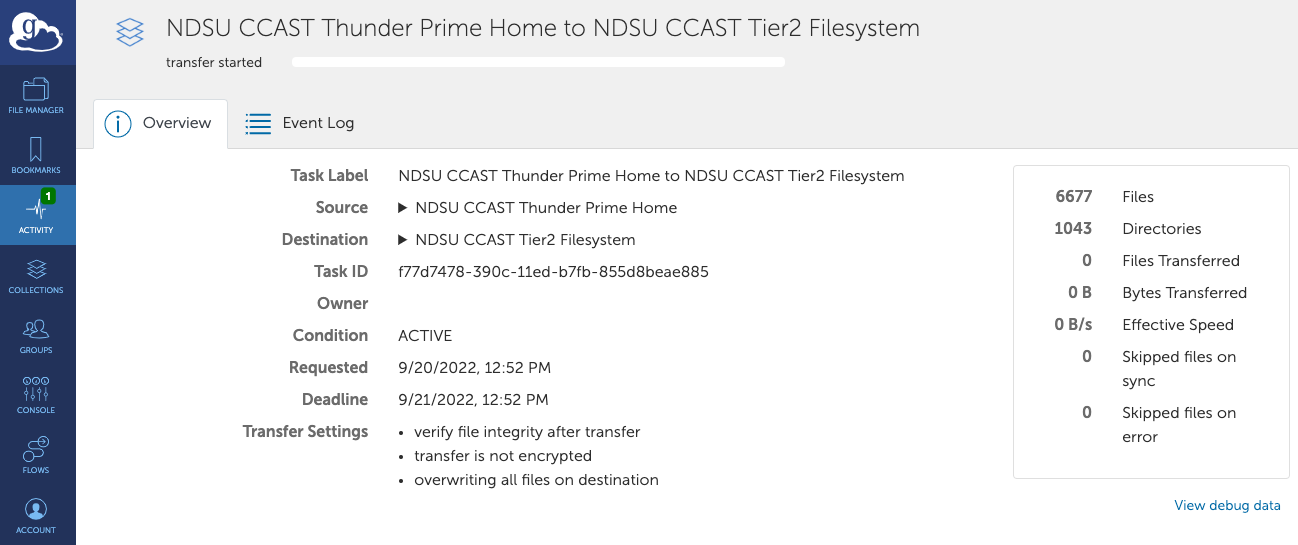
At this point, you can continue to monitor the transfer in the web browser, or you can close the tab and Globus will email you once the transfer is complete, or if it failed for some reason.
5. Ad hoc collections with Globus Connect Personal
In addition to transferring data between hosted collections (e.g. CCAST or other universities), you can also transfer data from/to a personal collection, hosted on a laptop, workstation, or server. For this, you will need to download and install Globus Connect Personal according to the Globus documentation for your operating system.

By default, Globus Connect Personal will share the user's home directory, and will produce a collection object which can be accessed on the Globus webapp. Additional endpoints can be shared from the Globus Connect Personal settings.

Once Globus Connect Personal is installed and running on your computer, you will be able to search for your collection in the Globus File Manager like you would for any other collection. Using a personal endpoint can be an effective way to transfer or sync data to CCAST from a lab or office computer.

6. Sharing data using guest collections
In addition to transferring data between collections, Globus also allows users to share data with collaborators using guest collections. A guest collection is a virtual folder within a mapped collection that can be shared with specific users or groups, with customizable access permissions.
Currently, guest collections are only allowed on the NDSU CCAST Thunder Prime Scratch endpoint. To create one:
- Navigate to the NDSU CCAST Thunder Prime Scratch endpoint in the Globus File Manager.
- Click the “Add Guest Collection” button near the top of the page.
- Choose a directory to share, and fill out the name and description fields.
- After creation, click on the guest collection to view its Overview and Permissions tabs.
- Use the Permissions tab to grant access to specific users or groups.
For more detailed instructions, refer to the official Globus documentation on https://docs.globus.org/how-to/share-files/.